
Table of Contents
Most of the application you develop will have multiple pages and you would require to have a separate URL for each one of them. React cannot handle routing on its own. There are many libraries like react router, reach router, react navigation etc to handle navigation in react. In this post we will see how we can use react router to handle navigation in react apps.
Project setup
Create a new react app using the following command:
1npx create-react-app react-router-tutorial
Now install the react-router-dom and history package:
1yarn add react-router-dom history
Basic Routing
Now in index.js wrap the App component with the BrowserRouter component,
which can be imported from the react-router-dom package that we just installed.
1import React from "react"2import ReactDOM from "react-dom"3import { BrowserRouter } from "react-router-dom"4import App from "./App"5import "./index.css"67ReactDOM.render(8 <React.StrictMode>9 <BrowserRouter>10 <App />11 </BrowserRouter>12 </React.StrictMode>,13 document.getElementById("root")14)
It is necessary to wrap any routes or links created using react router with Router component (in our case BrowserRouter).
So we wrap the whole application inside BrowserRouter.
BrowserRouter is a variant of Router which uses the HTML5 history API,
which helps in maintaining the browser history.
Now update App.js with the following code:
1import React from "react"2import { Routes, Route, Link } from "react-router-dom"34function App() {5 return (6 <div className="App">7 <nav>8 <ul>9 <li>10 <Link to="/">Home</Link>11 </li>12 <li>13 <Link to="dashboard">Dashboard</Link>14 </li>15 <li>16 <Link to="about">About</Link>17 </li>18 </ul>19 </nav>20 <div className="main">21 {/* Define all the routes */}22 <Routes>23 <Route path="/" element={<Home />}></Route>24 <Route path="about" element={<About />}></Route>25 <Route path="*" element={<NotFound />}></Route>26 </Routes>27 </div>28 </div>29 )30}3132export const Home = () => {33 return <div>You are in Home page</div>34}35export const About = () => {36 return <div>This is the page where you put details about yourself</div>37}38export const NotFound = () => {39 return <div>This is a 404 page</div>40}4142export default App
In the above code:
-
We are having a few navigation links, which are defined using the
Linkcomponent. Thetoproperty will determine the URL to which the user needs to be navigated. -
The component that needs to be rendered when the user is navigated to a particular path is defined by the
elementproperty in theRoutecomponent. For example,/aboutroute will render theAboutcomponent. -
If you want to display a 404 page when the path does not match with any of the routes then you can define a route with path as
*. -
Finally, we need to wrap all the
Routecomponents inside theRoutescomponent, which is again exported fromreact-router-dom. -
The order of
Routecomponents does not matter. React router will match the best route irrespective of order.
Before running our app, let's add some basic styling:
1body {2 margin: 0 auto;3 max-width: 900px;4}5nav ul {6 display: flex;7 list-style-type: none;8 margin: 0;9 padding: 0;10 box-shadow: 0 4px 6px -1px rgba(0, 0, 0, 0.1), 0 2px 4px -1px rgba(0, 0, 0, 0.06);11}1213nav a {14 text-decoration: none;15 display: inline-block;16 padding: 1rem;17}18.main {19 padding: 1rem;20}
Now run the application and navigate through the links and you should be able to see the appropriate components being rendered.
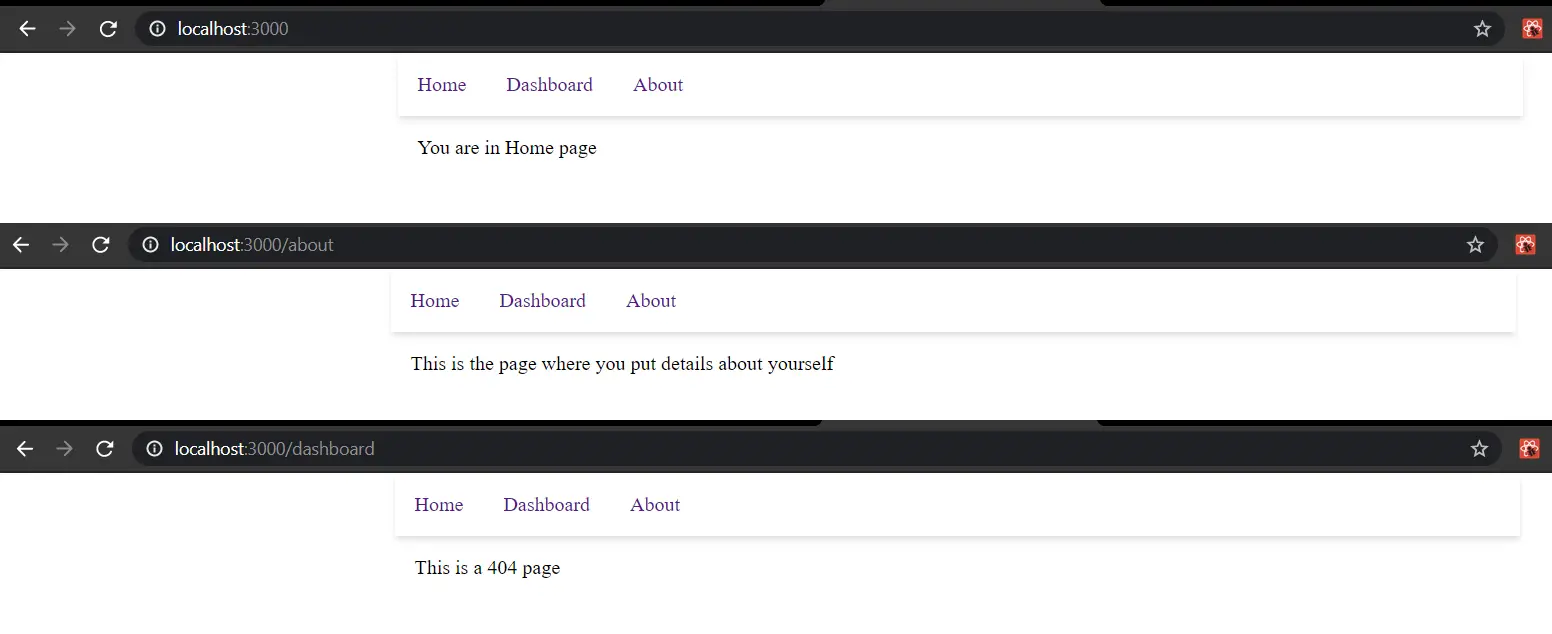
You would have observed that /dashboard lands in 404 page. This is because we do not have a dashboard route defined yet.
Also, you would see that we have created the Home and About component within App.js,
we can have the components defined in their own files. So let's create Dashboard component inside Dashboard.js file:
1import React from "react"23const Dashboard = () => {4 return <div>Dashboard</div>5}67export default Dashboard
Now import it in App.js and add include it in the list of Routes:
1//...23import Dashboard from "./Dashboard"45function App() {6 return (7 <div className="App">8 <nav>{/* ... */}</nav>9 <div className="main">10 <Routes>11 <Route path="/" element={<Home />}></Route>12 <Route path="about" element={<About />}></Route>13 <Route path="dashboard" element={<Dashboard />}></Route>14 <Route path="*" element={<NotFound />}></Route>15 </Routes>16 </div>17 </div>18 )19}20//...
Now you should have the dashboard route working.
Active Class Name
Since all of our links are navigation links it will be nice to highlight the link which is currently active.
For this purpose we have a special component called NavLink component.
1//...2import { Routes, Route, NavLink as Link } from "react-router-dom"34function App() {5 return (6 <div className="App">7 <nav>8 <ul>9 <li>10 <Link to="/" activeClassName="active">11 Home12 </Link>13 </li>14 <li>15 <Link to="dashboard" activeClassName="active">16 Dashboard17 </Link>18 </li>19 <li>20 <Link to="about" activeClassName="active">21 About22 </Link>23 </li>24 </ul>25 </nav>26 <div className="main">27 <Routes>{/* ... */}</Routes>28 </div>29 </div>30 )31}3233//...34export default App
In the above code, you will see that we are importing NavLink as the Link component and
also we have added activeClassName property with a value of 'active' to the Link component.
The active class will be added to the anchor, whichever matches the current URL.
Now to differentiate the active link, let's add some css:
1/* ... */2nav a.active {3 background-color: #eee;4}
Now if you run the application, you will see the active link having a different background color:
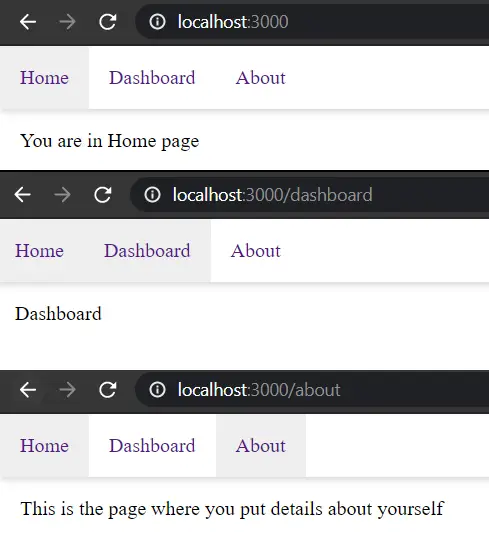
Now you will see that we have a problem! The Home link is highlighted every time.
This is because we have given / as the path for the Home link and all other page links have / in them.
So react router does a contains match to provide the active class name.
We can fix this by providing another parameter called end to our link.
end property tells react router to match the exact path and add active class name.
1<Link to="/" activeClassName="active" end>2 Home3</Link>
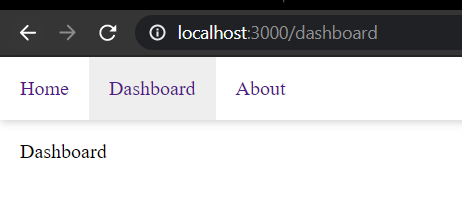
Now you should have the active links working as expected:
Nested Routes
In case you want to have pages inside the dashboard page, you can have routes configured inside the Dashboard component,
thus by nesting the routes under the routes defined in App.js.
Similar to what we have done in App.js, set up 3 routes inside Dashboard.js as shown below:
1import React from "react"2import { Routes, Link, Route } from "react-router-dom"34const Dashboard = () => {5 return (6 <div>7 <ul>8 <li>9 <Link to="">Profile</Link>10 </li>11 <li>12 <Link to="orders">Orders</Link>13 </li>14 <li>15 <Link to="quotes">Quotes</Link>16 </li>17 </ul>18 <div className="dashboard">19 <Routes>20 <Route path="/" element={<Profile />}></Route>21 <Route path="orders" element={<Orders />}></Route>22 <Route path="quotes" element={<Quotes />}></Route>23 </Routes>24 </div>25 </div>26 )27}2829export const Profile = () => {30 return <h2>Profile</h2>31}32export const Orders = () => {33 return <h2>Orders</h2>34}35export const Quotes = () => {36 return <h2>Quotes</h2>37}3839export default Dashboard
Now we need to update the dashboard route in App.js with a /* in the end so that it matches all the routes under it:
1<Route path="dashboard/*" element={<Dashboard />}></Route>
Also, let's add some styling:
1/* ... */2.main ul {3 display: flex;4 list-style-type: none;5 margin: 0;6 padding: 0;7}8.main ul li {9 margin-right: 1rem;10}1112.dashboard {13 padding: 1rem 0;14}
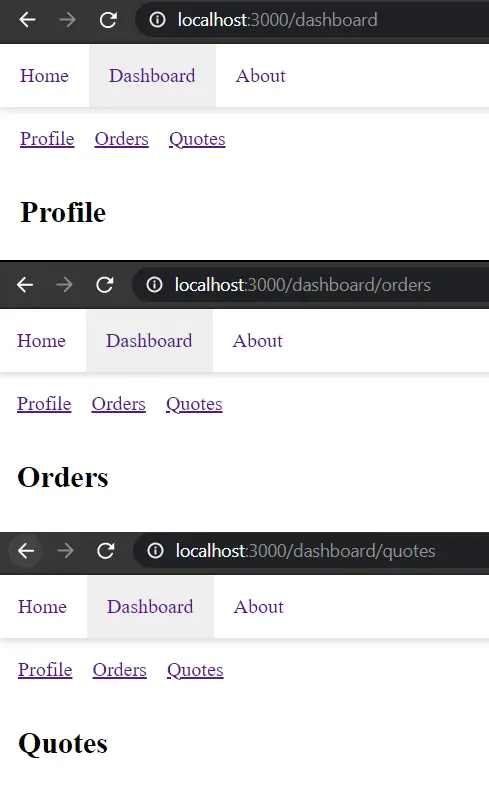
Now if you run the app, you will see:
- Orders and quotes pages having a URLs
/dashboard/ordersand/dashboard/quotes, this is because we nested these routes inside the dashboard route. - We have given a path of
"/"toProfilecomponent, so that it loads by default when the user hits/dashboardroute.
Passing URL parameters to a route
The next thing we will see is how we can pass URL parameters to a route:
1import React from "react"2import { Routes, Link, Route, useParams } from "react-router-dom"34const Dashboard = () => {5 return (6 <div>7 <ul>8 <li>9 <Link to="">Profile</Link>10 </li>11 <li>12 <Link to="orders">Orders</Link>13 </li>14 <li>15 <Link to="quotes">Quotes</Link>16 </li>17 </ul>18 <div className="dashboard">19 <Routes>20 <Route path="/" element={<Profile />}></Route>21 <Route path="orders" element={<Orders />}></Route>22 <Route path="quotes" element={<Quotes />}></Route>23 <Route path="order_details/:orderId" element={<OrderDetails />} />24 </Routes>25 </div>26 </div>27 )28}2930export const Profile = () => {31 return <h2>Profile</h2>32}33export const Orders = () => {34 const orderIds = ["10001", "10002", "10003"]35 return (36 <>37 <h2>Orders</h2>38 <ul className="orders">39 {/* Loop through the orders array and display link to order details */}40 {orderIds.map(orderId => {41 return (42 <li key={orderId}>43 <Link to={`/dashboard/order_details/${orderId}`}>44 View Order {orderId}45 </Link>46 </li>47 )48 })}49 </ul>50 </>51 )52}53export const Quotes = () => {54 return <h2>Quotes</h2>55}56export const OrderDetails = () => {57 const params = useParams()5859 return <h2>Details of order {params.orderId}</h2>60}6162export default Dashboard
In the above code:
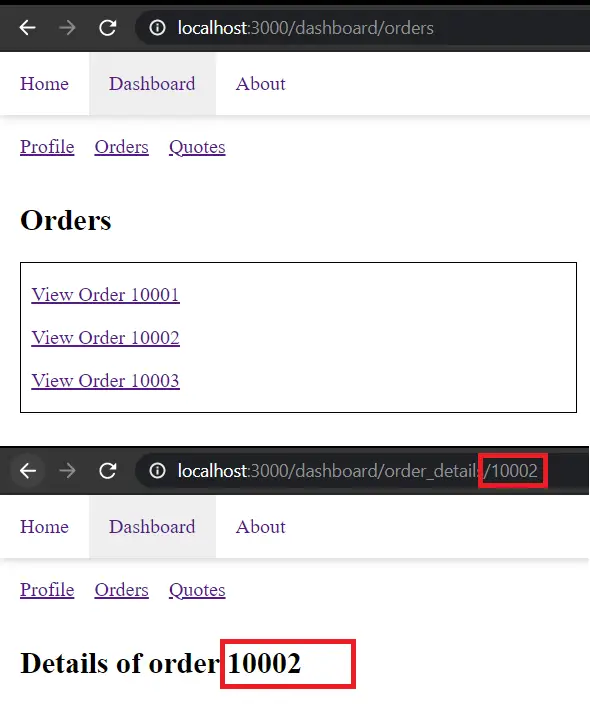
- We are looping through a list of order ids and creating a link to
order_detailsroute and we are appending it with the order id. - To catch the route dynamically, we add
:orderIdto the route configuration inOrderscomponent. - In the OrderDetails component,
we make use of the
useParamshook that can be imported from thereact-router-domto retrieve the value oforderIdand display it.
Before testing the application let's add some css:
1/* ... */2ul.orders {3 flex-direction: column;4 border: 1px solid;5 padding: 0.5rem;6}7.orders li {8 padding: 0.5rem 0;9}10ul.invoices {11 flex-direction: column;12 border: 1px solid;13 padding: 0.5rem;14}15.invoices li {16 padding: 0.5rem 0;17}
Now if you run run the app, you will see that we can retrieve the orderId parameter from the URL:
Navigating programmatically to a route
If you want to perform navigation on certain user action,
say on click of a button, react router provides us with a hook for it called useNavigate.
Now we have order details page, we can add a link back to orders page and implement it using useNavigate.
1//...23import { Routes, Link, Route, useParams, useNavigate } from "react-router-dom"45//...67export const OrderDetails = () => {8 const params = useParams()9 const navigate = useNavigate()1011 const onBackClick = e => {12 e.preventDefault()13 // navigate(-1);14 navigate("/dashboard/orders")15 }1617 return (18 <>19 <h2>Details of order {params.orderId}</h2>20 <a href="#" onClick={onBackClick}>21 Back to Orders22 </a>23 </>24 )25}
We can pass the absolute path where the user needs to be navigated or call navigate(-1) to go back a page.

Configuring Routes as an Object
It is not necessary to configure the routes as a component and wrap it inside the Routes component.
We can specify the route configuration in a JSON object as well.
This will help when we have dynamic routes and we get the route details from an API call.
Create a new component called RouteAsObj with the below code
1import React from "react"2import { useRoutes, Outlet } from "react-router"3import { Link } from "react-router-dom"45const RouteAsObj = () => {6 let element = useRoutes([7 { path: "/", element: <Route1 /> },8 { path: "route2", element: <Route2 /> },9 {10 path: "route3",11 element: <Route3 />,12 // children can be used to configure nested routes13 children: [14 { path: "child1", element: <Child1 /> },15 { path: "child2", element: <Child2 /> },16 ],17 },18 { path: "*", element: <NotFound /> },19 ])2021 return (22 <div>23 <ul>24 <li>25 <Link to="">Route1</Link>26 </li>27 <li>28 <Link to="route2">Route2</Link>29 </li>30 <li>31 <Link to="route3">Route3</Link>32 </li>33 </ul>34 {element}35 </div>36 )37}3839const Route1 = () => <h1>Route1</h1>40const Route2 = () => <h1>Route2</h1>41const Route3 = () => {42 return (43 <div>44 <h1>Route3</h1>45 <ul>46 <li>47 <Link to="child1">Child1</Link>48 </li>49 <li>50 <Link to="child2">Child2</Link>51 </li>52 </ul>53 <Outlet />54 </div>55 )56}57const Child1 = () => <h2>Child1</h2>58const Child2 = () => <h2>Child2</h2>59const NotFound = () => <h1>NotFound</h1>6061export default RouteAsObj
In the above code:
- We are creating the components similar to previous examples.
The difference is that we are making use of
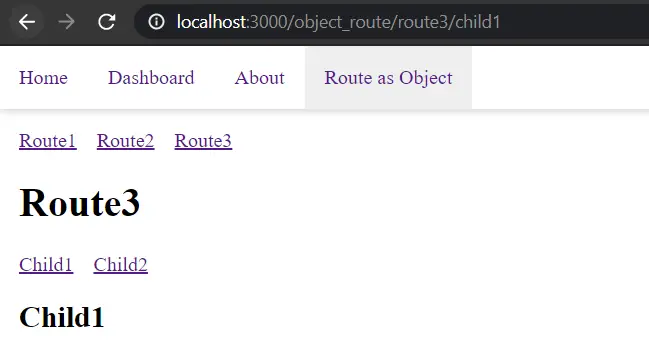
useRouteshook and passing our route configuration to it. TheuseRouteseither returns a valid react component, which we have embedded in the component aselement. - Also, you could see that we have added
<Outlet />component inside theRoute3. This will help in rendering the matching child route, when the routes are nested.
Now let's include the route in the App.js
1import React from "react"2import { Routes, Route, NavLink as Link } from "react-router-dom"3import Dashboard from "./Dashboard"4import RouteAsObj from "./RouteAsObj"56function App() {7 return (8 <div className="App">9 <nav>10 <ul>11 <li>12 <Link to="/" activeClassName="active" end>13 Home14 </Link>15 </li>16 <li>17 <Link to="dashboard" activeClassName="active">18 Dashboard19 </Link>20 </li>21 <li>22 <Link to="about" activeClassName="active">23 About24 </Link>25 </li>26 <li>27 <Link to="/object_route" activeClassName="active">28 Route as Object29 </Link>30 </li>31 </ul>32 </nav>33 <div className="main">34 <Routes>35 <Route path="/" element={<Home />}></Route>36 <Route path="about" element={<About />}></Route>37 <Route path="dashboard/*" element={<Dashboard />}></Route>38 <Route path="object_route/*" element={<RouteAsObj />}></Route>39 <Route path="*" element={<NotFound />}></Route>40 </Routes>41 </div>42 </div>43 )44}4546//...47export default App
Now if you run the app you would see the routes working as expected:
Query parameters
You might encounter scenarios where you need to extract the query parameters.
This can be done by using the useLocation hook provided by react router.
Let's create a Search component with a search form:
1import React, { useRef } from "react"2import { useLocation, useNavigate } from "react-router-dom"34function useQuery() {5 // Use the URLSearchParams API to extract the query parameters6 // useLocation().search will have the query parameters eg: ?foo=bar&a=b7 return new URLSearchParams(useLocation().search)8}910const Search = () => {11 const query = useQuery()1213 const term = query.get("term")1415 const inputRef = useRef(null)16 const navigate = useNavigate()1718 const formSubmitHandler = e => {19 //prevent the default form submission20 e.preventDefault()2122 //extract search term using refs.23 const searchValue = inputRef.current.value24 navigate(`?term=${searchValue}`)25 }2627 return (28 <div>29 <form action="" onSubmit={formSubmitHandler}>30 <input type="text" name="term" ref={inputRef} />31 <input type="submit" value="Search" />32 {/* Display the search term if it is present */}33 {term && <h2>Results for '{term}'</h2>}34 </form>35 </div>36 )37}3839export default Search
Here we are using yet another hook called useLocation, which will return the URL details.
The search property within it will have the query string.
We have made use of
URLSearchParams
API to extract the query parameters.
We have included this in a custom hook called useQuery,
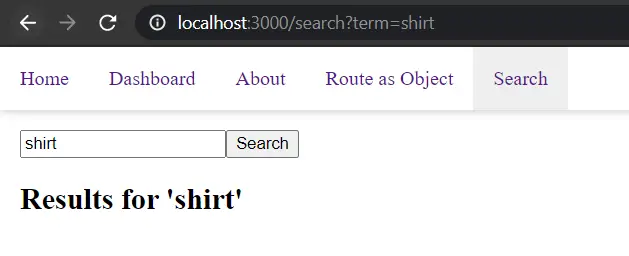
which is later used to extract the search term using the query.get("term") call inside Search component.
Now let's include a route to search page in the App component:
1//...2import Search from "./Search"34function App() {5 return (6 <div className="App">7 <nav>8 <ul>9 {/* Other Links */}10 <li>11 <Link to="/search" activeClassName="active">12 Search13 </Link>14 </li>15 </ul>16 </nav>17 <div className="main">18 <Routes>19 {/* Other Routes */}20 <Route path="search" element={<Search />}></Route>21 <Route path="*" element={<NotFound />}></Route>22 </Routes>23 </div>24 </div>25 )26}2728//...
Now if we run the app and search for something, we will see that it is displaying the searched term:
Authenticated Routes
You will have certain pages in your application that needs to be accessed only by logged in users.
We can secure such routes by writing a wrapper around the Route component.
Before writing the Route component, let's create a fake authentication function:
1export const fakeAuth = {2 isAuthenticated: false,3 login(callBack) {4 fakeAuth.isAuthenticated = true5 callBack()6 },7 logout(callBack) {8 fakeAuth.isAuthenticated = false9 callBack()10 },11}
Here we have isAuthenticated property, which will be set to true and false by the login and logout functions.
These functions will also call the passed callback function.
Now let's create a protected page, which needs to be secured from unauthorized access.
1import React from "react"2import { fakeAuth } from "./fakeAuth"3import { useNavigate } from "react-router-dom"45const ProtectedPage = ({ x }) => {6 const navigate = useNavigate()7 return (8 <div>9 <p>You are logged in. Welcome to protected page! Value of x is {x}</p>10 <button11 onClick={() => {12 fakeAuth.logout(() =>13 navigate("/login", { state: { from: { pathname: "/protected" } } })14 )15 }}16 >17 Sign out18 </button>19 </div>20 )21}2223export default ProtectedPage
Here we are showing a welcome message and a logout button, on click of which user will be redirected to login page.
Notice that we are passing the state as the second argument to navigate function,
this will be used to redirect the user to /protected route after login.
Now let's create the login page. Here we are having a login button,
on click of which we will call the fake login function and redirect the user to the pathname passed in the state.
In our case it will have the value as /protected.
1import React from "react"2import { useNavigate, useLocation } from "react-router-dom"3import { fakeAuth } from "./fakeAuth"45function LoginPage() {6 let navigate = useNavigate()7 let location = useLocation()89 let { from } = location.state || { from: { pathname: "/" } }10 let login = () => {11 fakeAuth.login(() => {12 navigate(from)13 })14 }1516 return (17 <div>18 <p>You must log in to view the page at {from.pathname}</p>19 <button onClick={login}>Log in</button>20 </div>21 )22}2324export default LoginPage
Now let's create the private route we mentioned earlier:
1import React from "react"2import { Navigate, useLocation } from "react-router-dom"3import { fakeAuth } from "./fakeAuth"45/**6 * A wrapper around the element which checks if the user is authenticated7 * If authenticated, renders the passed element8 * If not authenticated, redirects the user to Login page.9 */10const PrivateElement = ({ children }) => {11 let location = useLocation()12 return fakeAuth.isAuthenticated ? (13 children14 ) : (15 <Navigate to="/login" state={{ from: location }} />16 )17}1819export default PrivateElement
As you can see, the above route is a wrapper around the Route component to check if the user is authenticated.
If the user is authenticated then it renders the passed component otherwise
redirects the user to login page using the Navigate component.
Navigate component is another way of redirecting the user to another page.
We are also passing the from location to the login route so that user can be redirected back to the actual route once they log in.
Now let's wire up everything to App.js:
1import React from "react"2import { NavLink as Link, Route, Routes } from "react-router-dom"3import Dashboard from "./Dashboard"4import LoginPage from "./LoginPage"5import PrivateRoute from "./PrivateRoute"6import ProtectedPage from "./ProtectedPage"7import RouteAsObj from "./RouteAsObj"8import Search from "./Search"910function App() {11 return (12 <div className="App">13 <nav>14 <ul>15 <li>16 <Link to="/" activeClassName="active" end>17 Home18 </Link>19 </li>20 <li>21 <Link to="/dashboard" activeClassName="active">22 Dashboard23 </Link>24 </li>25 <li>26 <Link to="/about" activeClassName="active">27 About28 </Link>29 </li>30 <li>31 <Link to="/object_route" activeClassName="active">32 Route as Object33 </Link>34 </li>35 <li>36 <Link to="/search" activeClassName="active">37 Search38 </Link>39 </li>40 <li>41 <Link to="/public" activeClassName="active">42 Public Page43 </Link>44 </li>45 <li>46 <Link to="/protected" activeClassName="active">47 Protected Page48 </Link>49 </li>50 </ul>51 </nav>52 <div className="main">53 <Routes>54 <Route path="/" element={<Home />}></Route>5556 <Route path="about" element={<About />}></Route>57 <Route path="dashboard/*" element={<Dashboard />}></Route>58 <Route path="object_route/*" element={<RouteAsObj />}></Route>59 <Route path="search" element={<Search />}></Route>60 <Route path="public" element={<PublicPage />}></Route>61 <Route62 path="protected"63 element={64 <PrivateRoute>65 <ProtectedPage x={1} />66 </PrivateRoute>67 }68 ></Route>69 <Route path="login" element={<LoginPage />}></Route>70 <Route path="*" element={<NotFound />}></Route>71 </Routes>72 </div>73 </div>74 )75}7677export const Home = () => {78 return <div>You are in Home page</div>79}80export const About = () => {81 return <div>This is the page where you put details about yourself</div>82}83export const PublicPage = () => {84 return <div>This page can be accessed by anyone</div>85}86export const NotFound = () => {87 return <div>This is a 404 page</div>88}8990export default App
If you run the application now:

Code Splitting
When we have lot of pages in out application, we will end up having lot of code. We don't want our user to download all the code when they just load the home page. In order to package code of different routes to separate chunks, along with react router we can make use of loadable components, which takes advantage of dynamic imports.
To start with, install the following package:
1yarn add @loadable/component
In the App.js, let's import the Dashboard component dynamically and pass it to the loadable function.
It also accepts a second argument, which has a fallback property, which needs a component name as the argument.
This fallback component will be rendered while the js code is being downloaded.
Also, if the component js fails to load, the fallback component will remain being shown.
1import loadable from "@loadable/component"2import React from "react"3import { NavLink as Link, Route, Routes } from "react-router-dom"4import LoginPage from "./LoginPage"5import PrivateRoute from "./PrivateRoute"6import ProtectedPage from "./ProtectedPage"7import RouteAsObj from "./RouteAsObj"8import Search from "./Search"910const Loading = () => {11 return <div>Loading...</div>12}1314const Dashboard = loadable(() => import("./Dashboard.js"), {15 fallback: <Loading />,16})1718function App() {19 return (20 <div className="App">21 <nav>22 <ul>23 <li>24 <Link to="/" activeClassName="active" end>25 Home26 </Link>27 </li>28 <li>29 <Link to="/dashboard" activeClassName="active">30 Dashboard31 </Link>32 </li>33 <li>34 <Link to="/about" activeClassName="active">35 About36 </Link>37 </li>38 <li>39 <Link to="/object_route" activeClassName="active">40 Route as Object41 </Link>42 </li>43 <li>44 <Link to="/search" activeClassName="active">45 Search46 </Link>47 </li>48 <li>49 <Link to="/public" activeClassName="active">50 Public Page51 </Link>52 </li>53 <li>54 <Link to="/protected" activeClassName="active">55 Protected Page56 </Link>57 </li>58 </ul>59 </nav>60 <div className="main">61 <Routes>62 <Route path="/" element={<Home />}></Route>6364 <Route path="about" element={<About />}></Route>65 <Route path="dashboard/*" element={<Dashboard />}></Route>66 <Route path="object_route/*" element={<RouteAsObj />}></Route>67 <Route path="search" element={<Search />}></Route>68 <Route path="public" element={<PublicPage />}></Route>69 <Route70 path="protected"71 element={72 <PrivateRoute>73 <ProtectedPage x={1} />74 </PrivateRoute>75 }76 ></Route>77 <Route path="login" element={<LoginPage />}></Route>78 <Route path="*" element={<NotFound />}></Route>79 </Routes>80 </div>81 </div>82 )83}8485export const Home = () => {86 return <div>You are in Home page</div>87}88export const About = () => {89 return <div>This is the page where you put details about yourself</div>90}91export const PublicPage = () => {92 return <div>This page can be accessed by anyone</div>93}94export const NotFound = () => {95 return <div>This is a 404 page</div>96}9798export default App
Now if you open the browsers network tab and load the home page, you would see a bunch of files being loaded:
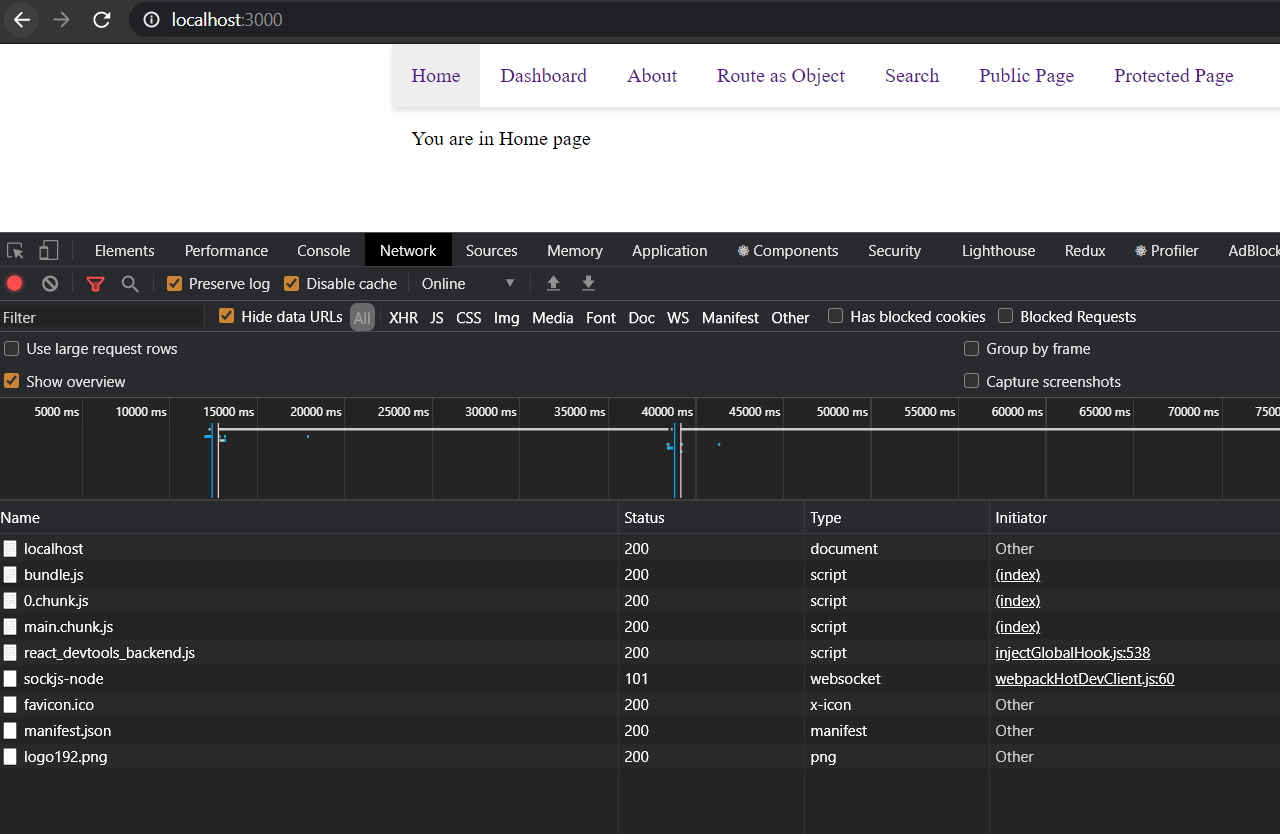
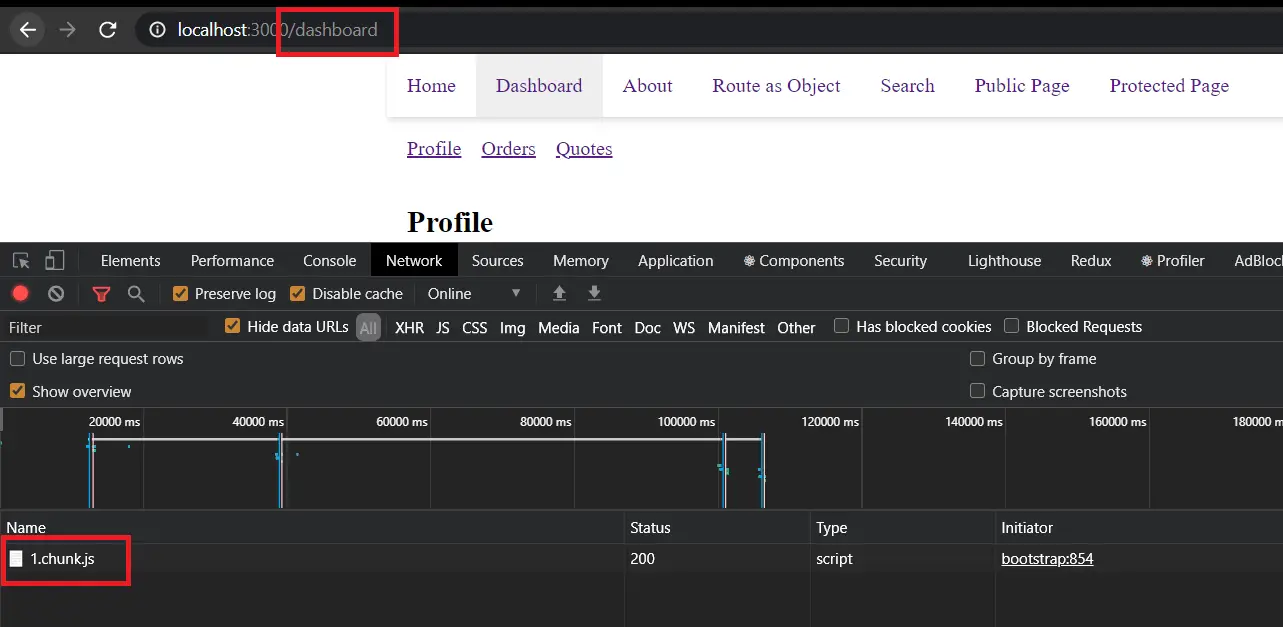
Now clear the network logs and click on dashboard link and you will observe a new js file being loaded, which is responsible for rendering the contents inside dashboard:
Index Routes
Index routes can be used when there is a list of routes generated programmatically and you need to display a fallback text or component when the parameter is not provided.
That is, if you have routes like /invoices/50001, /invoices/50002, so on and,
if the user visits /invoices you may need to display them a message telling them to select an invoice.
Create a file named Invoices.js with the following code. This is similar to the order details route we created earlier.
1import React from "react"2import { Link, Outlet, useParams } from "react-router-dom"34export const Invoices = () => {5 const invoiceIds = ["50001", "50002", "50003"]6 return (7 <>8 <h2>Invoices</h2>9 <ul className="invoices">10 {invoiceIds.map(invoiceId => {11 return (12 <li key={invoiceId}>13 <Link to={`/invoices/${invoiceId}`}>14 View Invoice {invoiceId}15 </Link>16 </li>17 )18 })}19 <Outlet />20 </ul>21 </>22 )23}2425export const Invoice = () => {26 const params = useParams()2728 return (29 <>30 <h2>Details of invoice {params.invoiceId}</h2>31 </>32 )33}3435export default Invoices
In App.js we can make use of the nested routes to specify the index route.
1import loadable from "@loadable/component"2import React from "react"3import { NavLink as Link, Route, Routes } from "react-router-dom"4import Invoices, { Invoice } from "./Invoices"5import LoginPage from "./LoginPage"6import PrivateRoute from "./PrivateRoute"7import ProtectedPage from "./ProtectedPage"8import RouteAsObj from "./RouteAsObj"9import Search from "./Search"1011const Loading = () => {12 return <div>Loading...</div>13}1415const Dashboard = loadable(() => import("./Dashboard.js"), {16 fallback: <Loading />,17})1819function App() {20 return (21 <div className="App">22 <nav>23 <ul>24 <li>25 <Link to="/" activeClassName="active" end>26 Home27 </Link>28 </li>29 <li>30 <Link to="/dashboard" activeClassName="active">31 Dashboard32 </Link>33 </li>34 <li>35 <Link to="/about" activeClassName="active">36 About37 </Link>38 </li>39 <li>40 <Link to="/object_route" activeClassName="active">41 Route as Object42 </Link>43 </li>44 <li>45 <Link to="/search" activeClassName="active">46 Search47 </Link>48 </li>49 <li>50 <Link to="/public" activeClassName="active">51 Public Page52 </Link>53 </li>54 <li>55 <Link to="/protected" activeClassName="active">56 Protected Page57 </Link>58 </li>59 <li>60 <Link to="/invoices" activeClassName="active">61 Invoices62 </Link>63 </li>64 </ul>65 </nav>66 <div className="main">67 <Routes>68 <Route path="/" element={<Home />}></Route>6970 <Route path="about" element={<About />}></Route>71 <Route path="dashboard/*" element={<Dashboard />}></Route>72 <Route path="object_route/*" element={<RouteAsObj />}></Route>73 <Route path="search" element={<Search />}></Route>74 <Route path="public" element={<PublicPage />}></Route>75 <Route76 path="protected"77 element={78 <PrivateRoute>79 <ProtectedPage x={1} />80 </PrivateRoute>81 }82 ></Route>83 <Route path="login" element={<LoginPage />}></Route>84 <Route path="invoices" element={<Invoices />}>85 <Route86 index87 element={<p>Please select an invoice above</p>}88 ></Route>89 <Route path=":invoiceId" element={<Invoice />} />90 </Route>9192 <Route path="*" element={<NotFound />} />93 </Routes>94 </div>95 </div>96 )97}9899export const Home = () => {100 return <div>You are in Home page</div>101}102export const About = () => {103 return <div>This is the page where you put details about yourself</div>104}105export const PublicPage = () => {106 return <div>This page can be accessed by anyone</div>107}108export const NotFound = () => {109 return <div>This is a 404 page</div>110}111112export default App
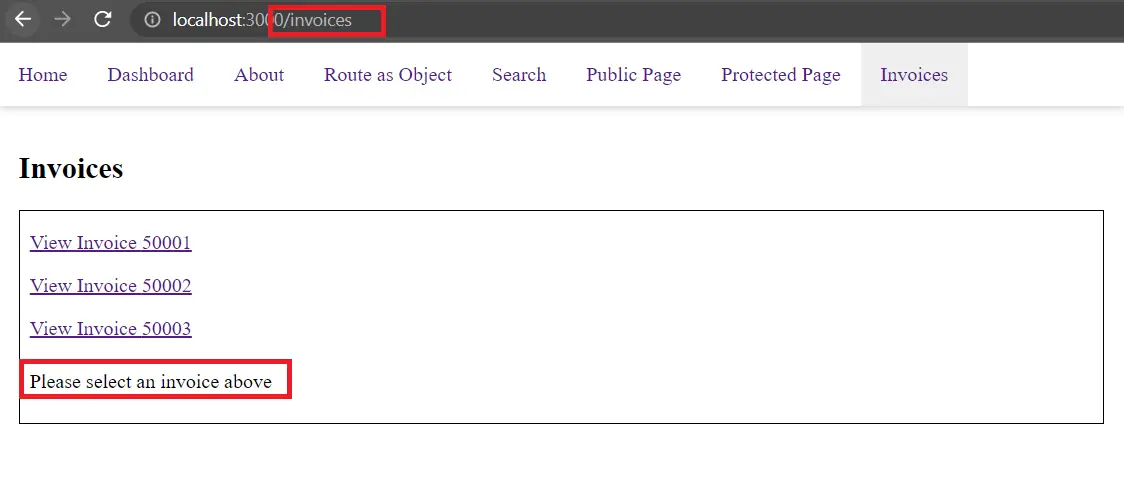
Now if you run and visit the /invoices route, you will see the fallback text displayed:
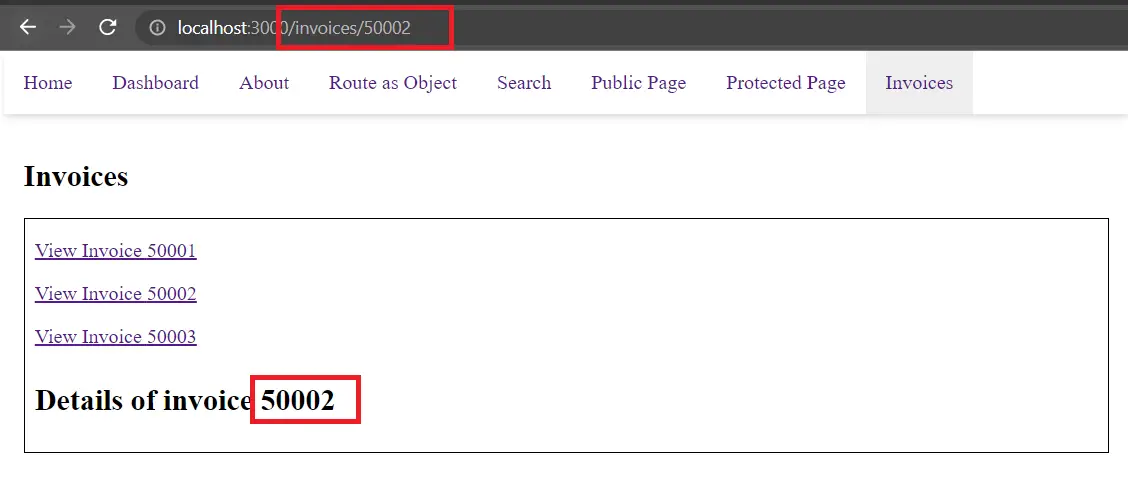
If you click on one of the invoice links, you will be navigated to the details page:
Source code and Demo
You can view the complete source code here and a demo here.
If you have liked article, do follow me on twitter to get more real time updates!
Comments