
Table of Contents
When our project grows and we add more functionalities, we end up adding a lot of code and libraries, which result in a larger bundle size. A bundle size of a few hundred KBs might not feel a lot, but in slower networks or in mobile networks it will take a longer time to load thus creating a bad user experience.
The solution to this problem is to reduce the bundle size. But if we delete the large packages then our functionalities will be broken. So we will not be deleting the packages, but we will only be loading the js code which is required for a particular page. Whenever the user navigates or performs an action on the page, we will download the code on the fly, thereby speeding up the initial page load.
When the Create React App builds the code for production, it generates only 2 main files:
- A file having react library code and its dependencies.
- A file having your app logic and its dependencies.
So to generate a separate file for each component or each route we can either make use of React.lazy,
which comes out of the box with react or any other third party library. In this tutorial, we will see both the ways.
Initial Project Setup
Create a react app using the following command:
1npx create-react-app code-splitting-react
Code splitting using React.lazy
Create a new component Home inside the file Home.js with the following code:
1import React, { useState } from "react"23const Home = () => {4 const [showDetails, setShowDetails] = useState(false)5 return (6 <div>7 <button8 onClick={() => setShowDetails(true)}9 style={{ marginBottom: "1rem" }}10 >11 Show Dog Image12 </button>13 </div>14 )15}1617export default Home
Here we have a button, which on clicked will set the value of showDetails state to true.
Now create DogImage component with the following code:
1import React, { useEffect, useState } from "react"23const DogImage = () => {4 const [imageUrl, setImageUrl] = useState()5 useEffect(() => {6 fetch("https://dog.ceo/api/breeds/image/random")7 .then(response => {8 return response.json()9 })10 .then(data => {11 setImageUrl(data.message)12 })13 }, [])1415 return (16 <div>17 {imageUrl && (18 <img src={imageUrl} alt="Random Dog" style={{ width: "300px" }} />19 )}20 </div>21 )22}2324export default DogImage
In this component,
whenever the component gets mounted we are fetching random dog image from Dog API using the useEffect hook.
When the URL of the image is available, we are displaying it.
Now let's include the DogImage component in our Home component, whenever showDetails is set to true:
1import React, { useState } from "react"2import DogImage from "./DogImage"3const Home = () => {4 const [showDetails, setShowDetails] = useState(false)5 return (6 <div>7 <button8 onClick={() => setShowDetails(true)}9 style={{ marginBottom: "1rem" }}10 >11 Show Dog Image12 </button>13 {showDetails && <DogImage />}14 </div>15 )16}17export default Home
Now include Home component inside App component:
1import React from "react"2import Home from "./Home"34function App() {5 return (6 <div className="App">7 <Home />8 </div>9 )10}1112export default App
Before we run the app, let's add few css to index.css:
1body {2 margin: 1rem auto;3 max-width: 900px;4}
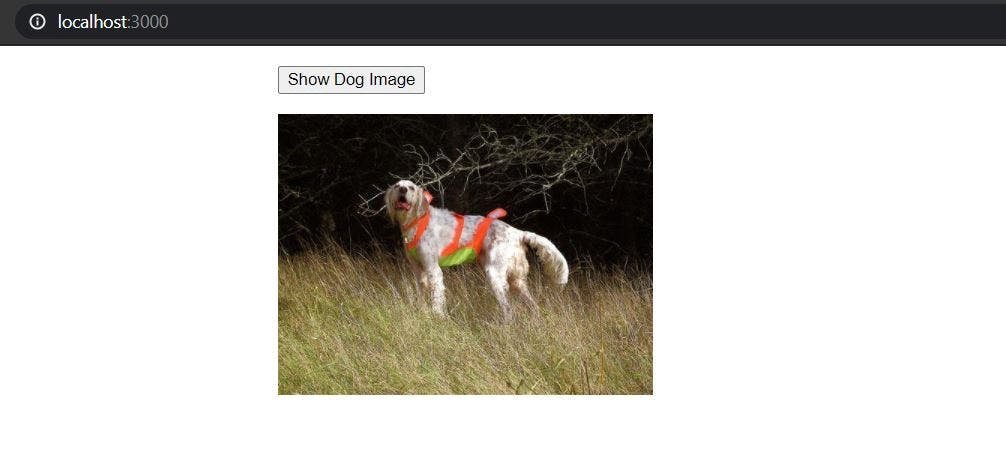
Now if you run the app and click on the button, you will see a random dog image:
Wrapping with Suspense
React introduced Suspense in version 16.6, which lets you wait for something to happen before rendering a component. Suspense can be used along with React.lazy for dynamically loading a component. Since details of things being loaded or when the loading will complete is not known until it is loaded, it is called suspense.
Now we can load the DogImage component dynamically when the user clicks on the button.
Before that, let's create a Loading component that will be displayed when the component is being loaded.
1import React from "react"23const Loading = () => {4 return <div>Loading...</div>5}67export default Loading
Now in Home.js let's dynamically import DogImage component using React.lazy and wrap the imported component with Suspense:
1import React, { Suspense, useState } from "react"2import Loading from "./Loading"34// Dynamically Import DogImage component5const DogImage = React.lazy(() => import("./DogImage"))67const Home = () => {8 const [showDetails, setShowDetails] = useState(false)9 return (10 <div>11 <button12 onClick={() => setShowDetails(true)}13 style={{ marginBottom: "1rem" }}14 >15 Show Dog Image16 </button>17 {showDetails && (18 <Suspense fallback={<Loading />}>19 <DogImage />20 </Suspense>21 )}22 </div>23 )24}25export default Home
Suspense accepts an optional parameter called fallback,
which will is used to render a intermediate screen when the components wrapped inside Suspense is being loaded.
We can use a loading indicator like spinner as a fallback component.
Here, we are using Loading component created earlier for the sake of simplicity.
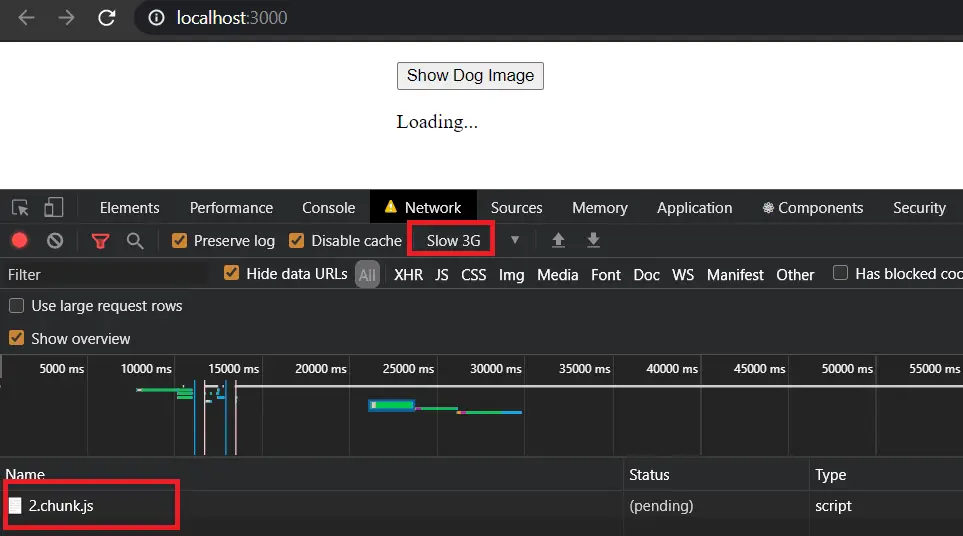
Now if you simulate a slow 3G network and click on the "Show Dog Image" button, you will see a separate js code being downloaded and "Loading..." text being displayed during that time.
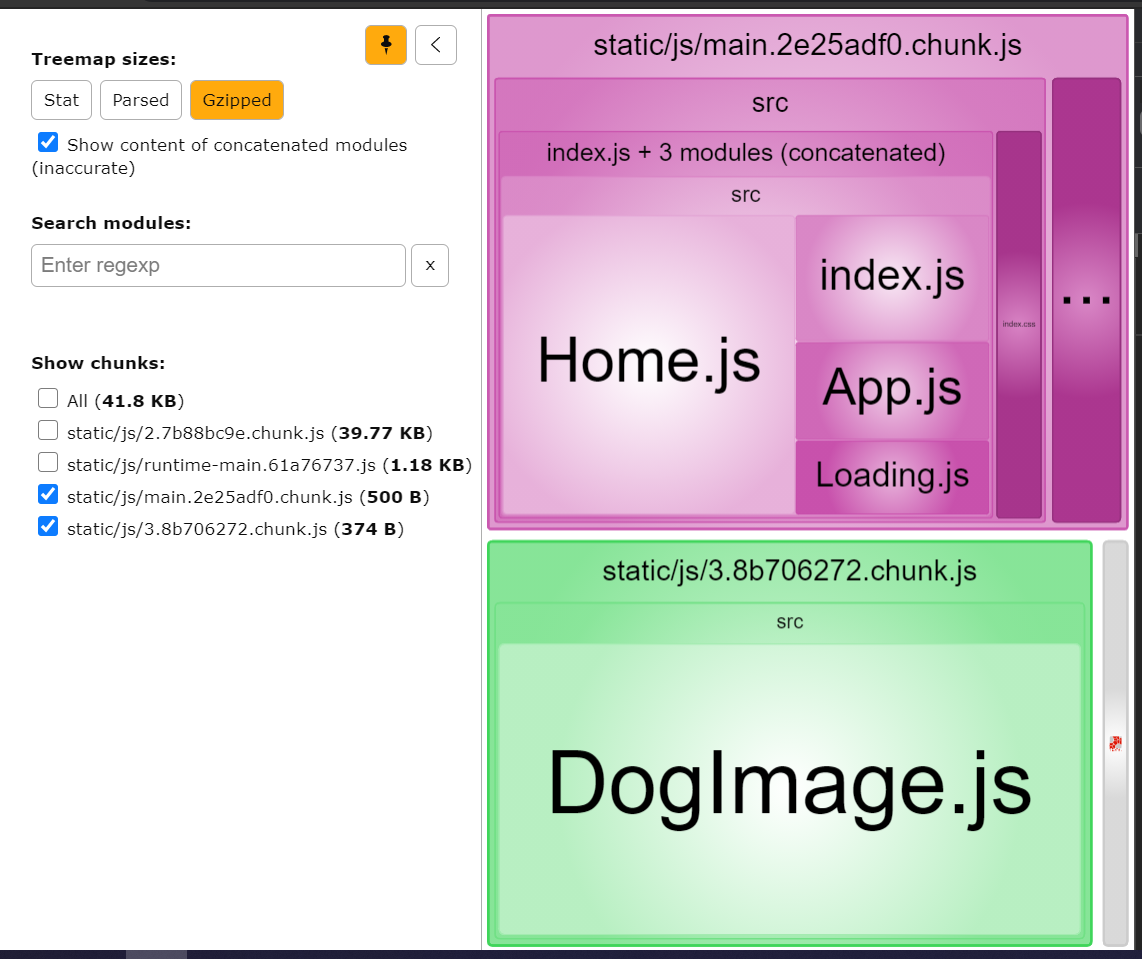
Analyzing the bundles
To further confirm that the code split is successful, let's see the bundles created using webpack-bundle-analyzer
Install webpack-bundle-analyzer as a development dependency:
1yarn add webpack-bundle-analyzer -D
Create a file named analyze.js in the root directory with the following content:
1// script to enable webpack-bundle-analyzer2process.env.NODE_ENV = "production"3const webpack = require("webpack")4const BundleAnalyzerPlugin =5 require("webpack-bundle-analyzer").BundleAnalyzerPlugin6const webpackConfigProd = require("react-scripts/config/webpack.config")(7 "production"8)910webpackConfigProd.plugins.push(new BundleAnalyzerPlugin())1112// actually running compilation and waiting for plugin to start explorer13webpack(webpackConfigProd, (err, stats) => {14 if (err || stats.hasErrors()) {15 console.error(err)16 }17})
Run the following command in the terminal:
1node analyze.js
Now a browser window will automatically open with the URL http://127.0.0.1:8888
If you see the bundles, you will see that DogImage.js is stored in a different bundle than that of Home.js:
Error Boundaries
Now if you try to click on "Show Dog Image" when you are offline, you will see a blank screen and if your user encounters this, they will not know what to do.
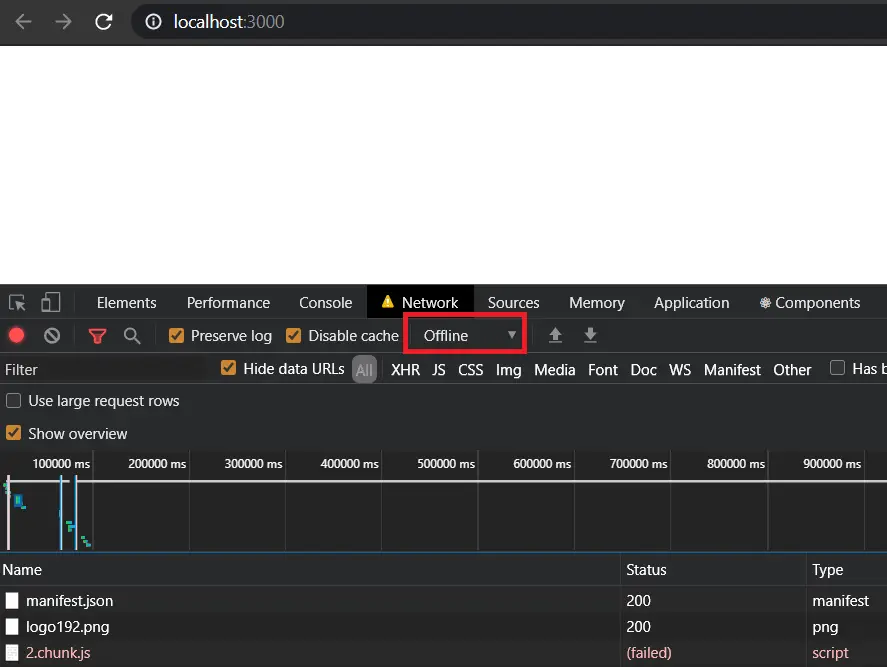
This will happen whenever there no network or the code failed to load due to any other reason.
If we check the console for errors, we will see that React telling us to add error boundaries:

We can make use of error boundaries to handle any unexpected error that might occur during the run time of the application. So let's add an error boundary to our application:
1import React from "react"23class ErrorBoundary extends React.Component {4 constructor(props) {5 super(props)6 this.state = { hasError: false }7 }89 static getDerivedStateFromError(error) {10 return { hasError: true }11 }1213 render() {14 if (this.state.hasError) {15 return <p>Loading failed! Please reload.</p>16 }1718 return this.props.children19 }20}2122export default ErrorBoundary
In the above class based component,
we are displaying a message to the user to reload the page whenever the local state hasError is set to true.
Whenever an error occurs inside the components wrapped within ErrorBoundary,
getDerivedStateFromError will be called and hasError will be set to true.
Now let's wrap our suspense component with error boundary:
1import React, { Suspense, useState } from "react"2import ErrorBoundary from "./ErrorBoundary"3import Loading from "./Loading"45// Dynamically Import DogImage component6const DogImage = React.lazy(() => import("./DogImage"))78const Home = () => {9 const [showDetails, setShowDetails] = useState(false)10 return (11 <div>12 <button13 onClick={() => setShowDetails(true)}14 style={{ marginBottom: "1rem" }}15 >16 Show Dog Image17 </button>18 {showDetails && (19 <ErrorBoundary>20 <Suspense fallback={<Loading />}>21 <DogImage />22 </Suspense>23 </ErrorBoundary>24 )}25 </div>26 )27}28export default Home
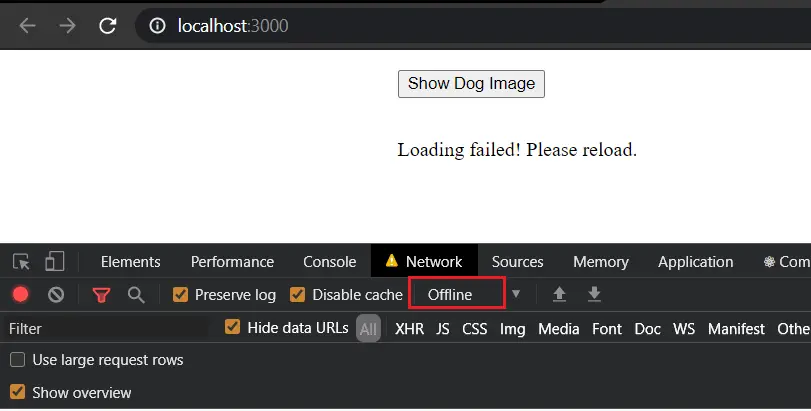
Now if our users click on "Load Dog Image" when they are offline, they will see an informative message:
Code Splitting Using Loadable Components
When you have multiple pages in your application and if you want to bundle code of each route a separate bundle. We will make use of react router dom for routing in this app. In my previous article, I have explained in detail about React Router.
Let's install react-router-dom and history:
1yarn add react-router-dom@next history
Once installed, let's wrap App component with BrowserRouter inside index.js:
1import React from "react"2import ReactDOM from "react-dom"3import "./index.css"4import App from "./App"5import { BrowserRouter } from "react-router-dom"67ReactDOM.render(8 <React.StrictMode>9 <BrowserRouter>10 <App />11 </BrowserRouter>12 </React.StrictMode>,13 document.getElementById("root")14)
Let's add some Routes and Navigation links in App.js:
1import React from "react"2import { Link, Route, Routes } from "react-router-dom"3import CatImage from "./CatImage"4import Home from "./Home"56function App() {7 return (8 <div className="App">9 <ul>10 <li>11 <Link to="/">Dog Image</Link>12 </li>13 <li>14 <Link to="cat">Cat Image</Link>15 </li>16 </ul>1718 <Routes>19 <Route path="/" element={<Home />}></Route>20 <Route path="cat" element={<CatImage />}></Route>21 </Routes>22 </div>23 )24}2526export default App
Now let's create CatImage component similar to DogImage component:
1import React, { useEffect, useState } from "react"23const CatImage = () => {4 const [imageUrl, setImageUrl] = useState()5 useEffect(() => {6 fetch("https://aws.random.cat/meow")7 .then(response => {8 return response.json()9 })10 .then(data => {11 setImageUrl(data.file)12 })13 }, [])1415 return (16 <div>17 {imageUrl && (18 <img src={imageUrl} alt="Random Cat" style={{ width: "300px" }} />19 )}20 </div>21 )22}2324export default CatImage
Let's add some css for the navigation links:
1body {2 margin: 1rem auto;3 max-width: 900px;4}56ul {7 list-style-type: none;8 display: flex;9 padding-left: 0;10}11li {12 padding-right: 1rem;13}
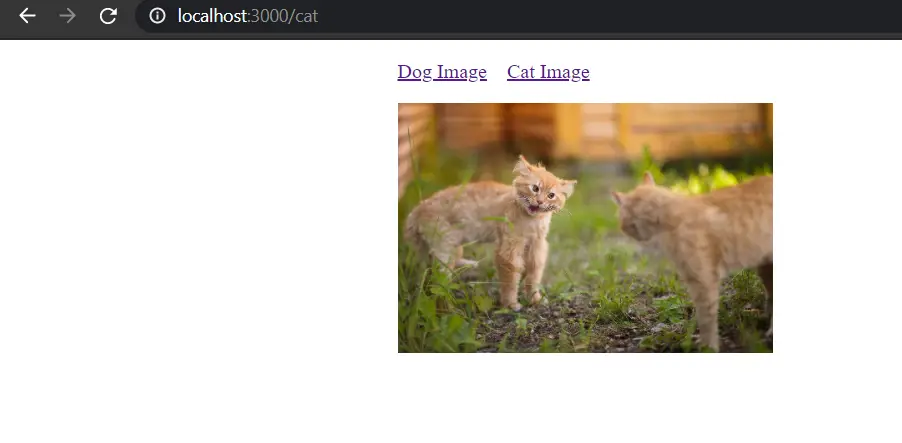
Now if you open the /cat route, you will see a beautiful cat image loaded:
In order to load the CatImage component to a separate bundle, we can make use of loadable components.
Let's add @loadable-component to our package:
1yarn add @loadable/component
In App.js, let's load the CatImage component dynamically using loadable function,
which is a default export of the loadable components we installed just now:
1import React from "react"2import { Link, Route, Routes } from "react-router-dom"3import Home from "./Home"4import loadable from "@loadable/component"5import Loading from "./Loading"67const CatImage = loadable(() => import("./CatImage.js"), {8 fallback: <Loading />,9})1011function App() {12 return (13 <div className="App">14 <ul>15 <li>16 <Link to="/">Dog Image</Link>17 </li>18 <li>19 <Link to="cat">Cat Image</Link>20 </li>21 </ul>2223 <Routes>24 <Route path="/" element={<Home />}></Route>25 <Route path="cat" element={<CatImage />}></Route>26 </Routes>27 </div>28 )29}3031export default App
You can see that even loadable function accepts a fallback component to display a loader/spinner.
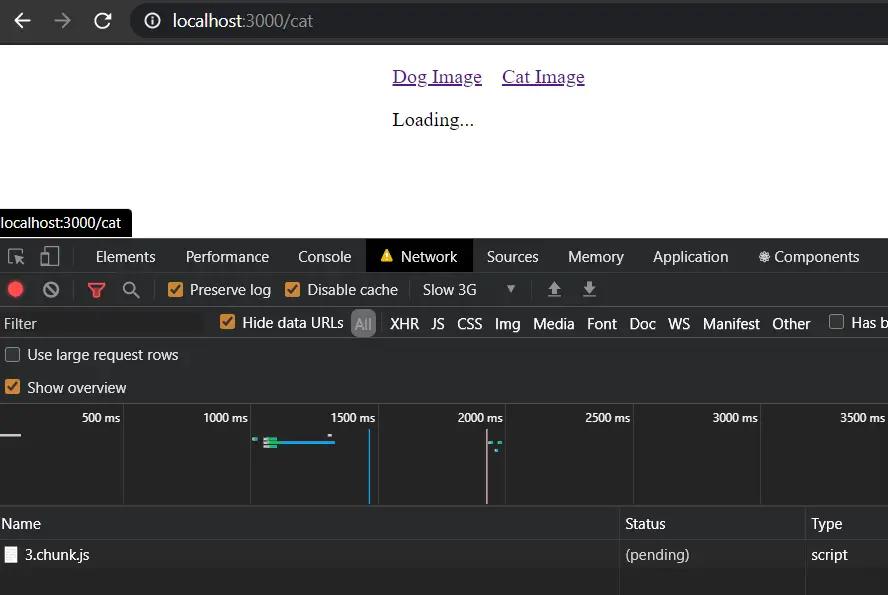
Now if you run the application in a slow 3G network,
you will see the loader and js bundle related to CatImage component being loaded:
Now if you run the bundle analyzer using the following command:
1node analyze.js
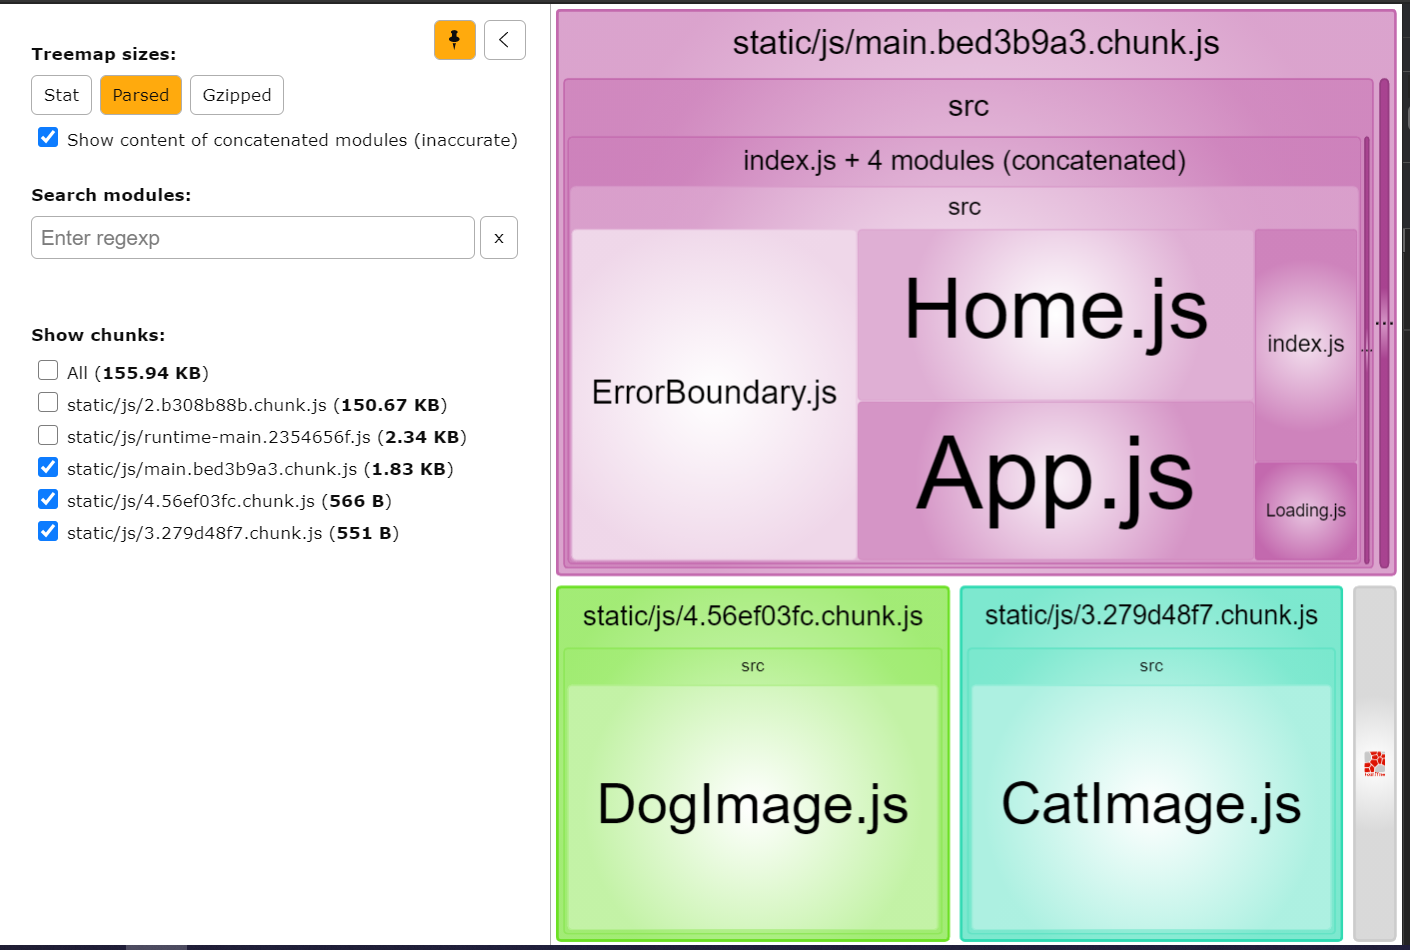
You will see that CatImage is located inside a separate bundle:
You can use
React.lazyfor Route based code splitting as well.
Source code and Demo
You can view the complete source code here and a demo here.
If you have liked article, do follow me on twitter to get more real time updates!