
Table of Contents
In this tutorial, we will learn how to implement alerts in react native. We will also learn different options present in Android and iOS to control the alerts.
Creating the project
We will be making use of Expo in order to bootstrap our project. If you haven't installed Expo earlier then run the following command to install it:
1npm install --global expo-cli
Now create a new Expo project using the following command. While creating the project, it would ask you to select a template. Choose "blank" template.
1expo init react-native-alert
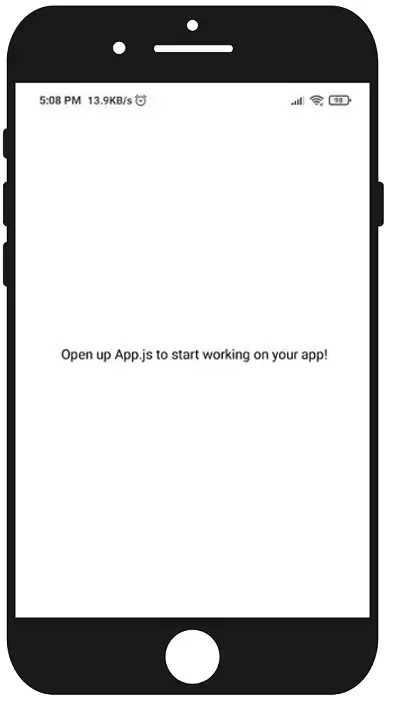
Once the installation is completed run npm start and run the application on your device or
on Android Studio Emulator or
iOS Emulator. You should be able to see the screen as shown below:
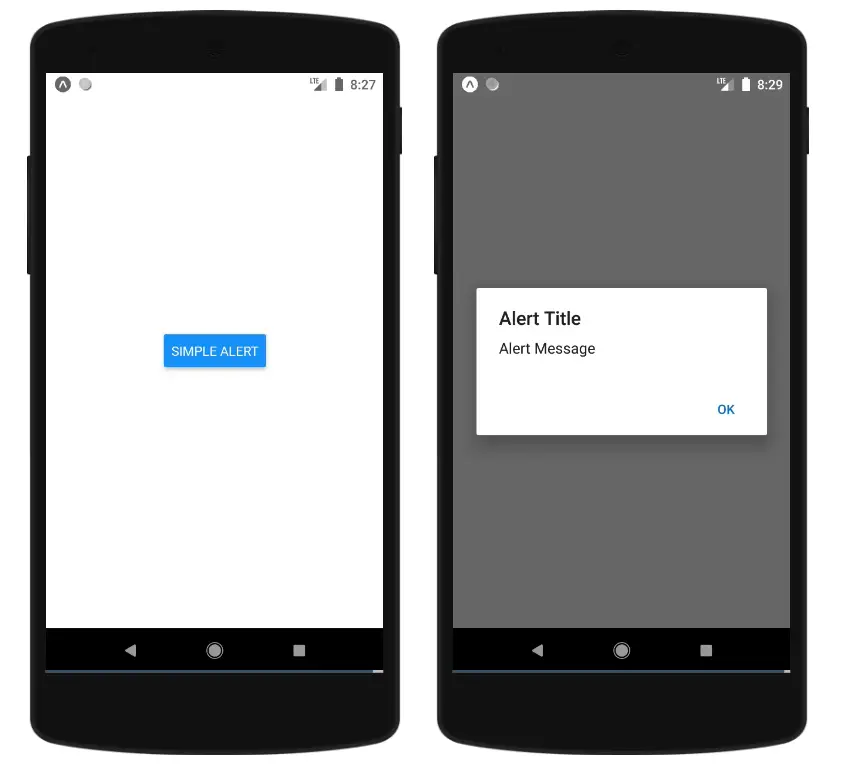
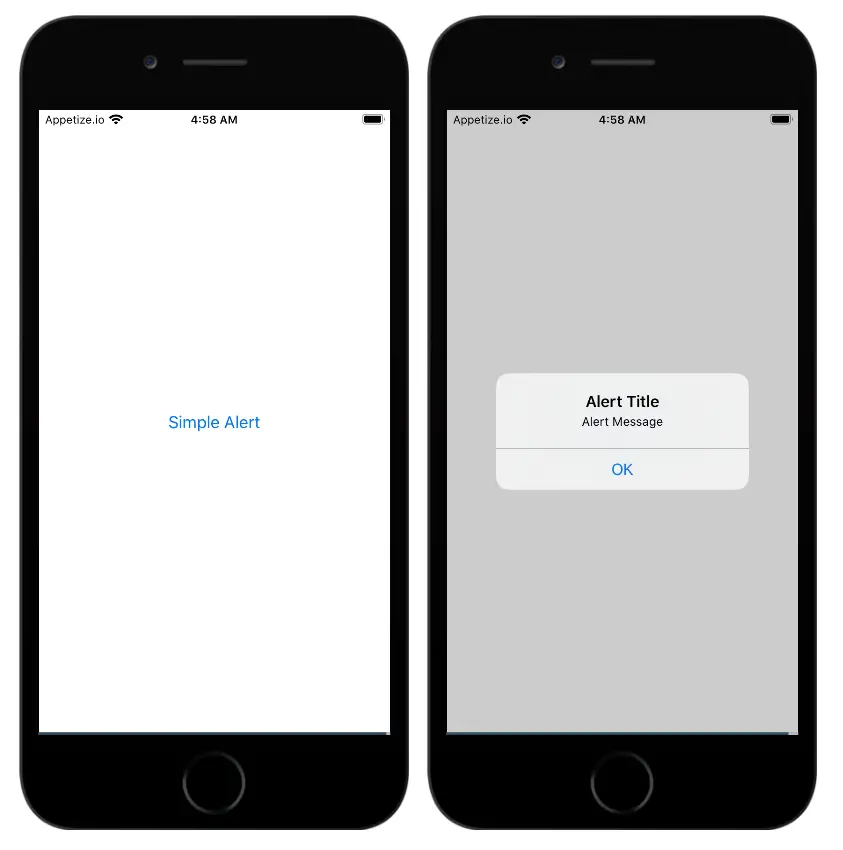
Simple Alert
Let's first display a simple alert with one "OK" button. Update your App.js with the following code:
1import React from "react"2import { StyleSheet, Text, View, Alert, Button } from "react-native"34export default function App() {5 const showSimpleAlert = () => {6 Alert.alert("Alert Title", "Alert Message", [7 { text: "OK", onPress: () => console.log("ok Pressed") },8 ])9 }10 return (11 <View style={styles.container}>12 <Button title="Simple Alert" onPress={showSimpleAlert} />13 </View>14 )15}1617const styles = StyleSheet.create({18 container: {19 flex: 1,20 backgroundColor: "#fff",21 alignItems: "center",22 justifyContent: "space-around",23 },24})
Now if you run the app, you should be able to see a button and when pressed, will show the alert dialog:
Screenshots
Android:
iOS:
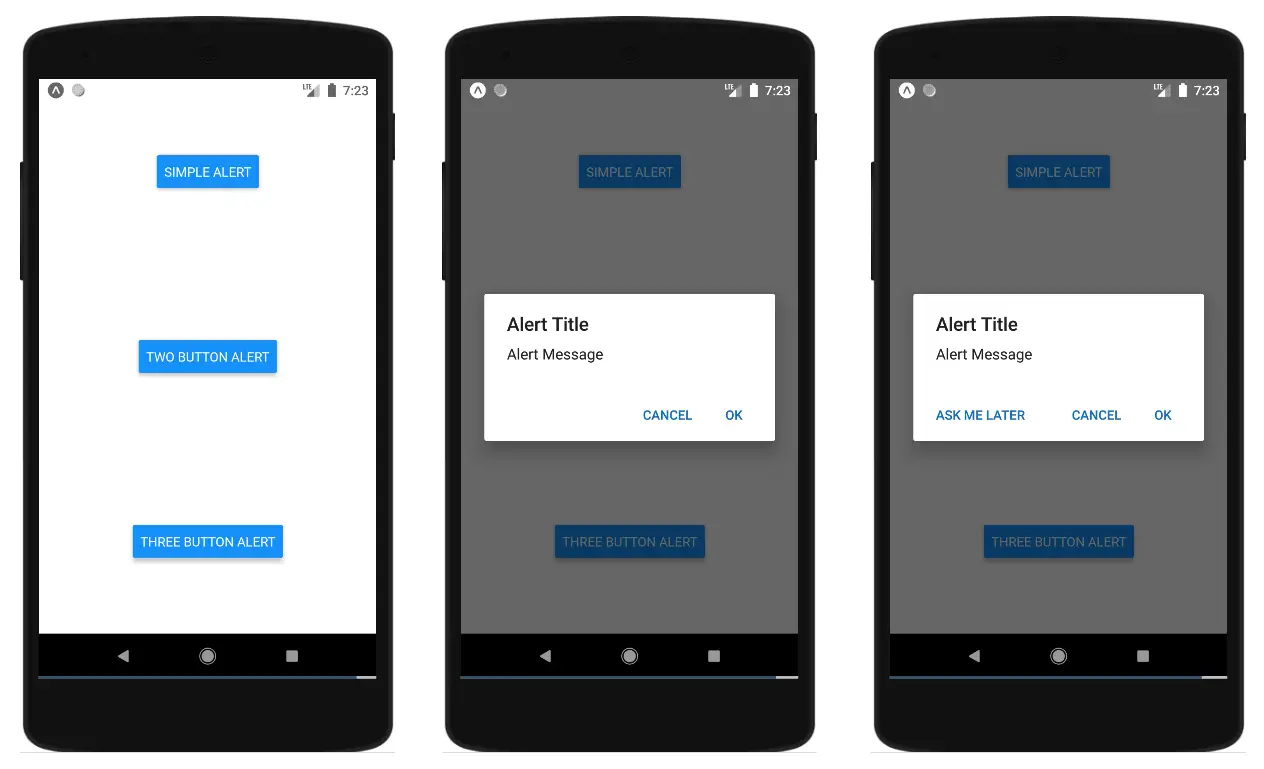
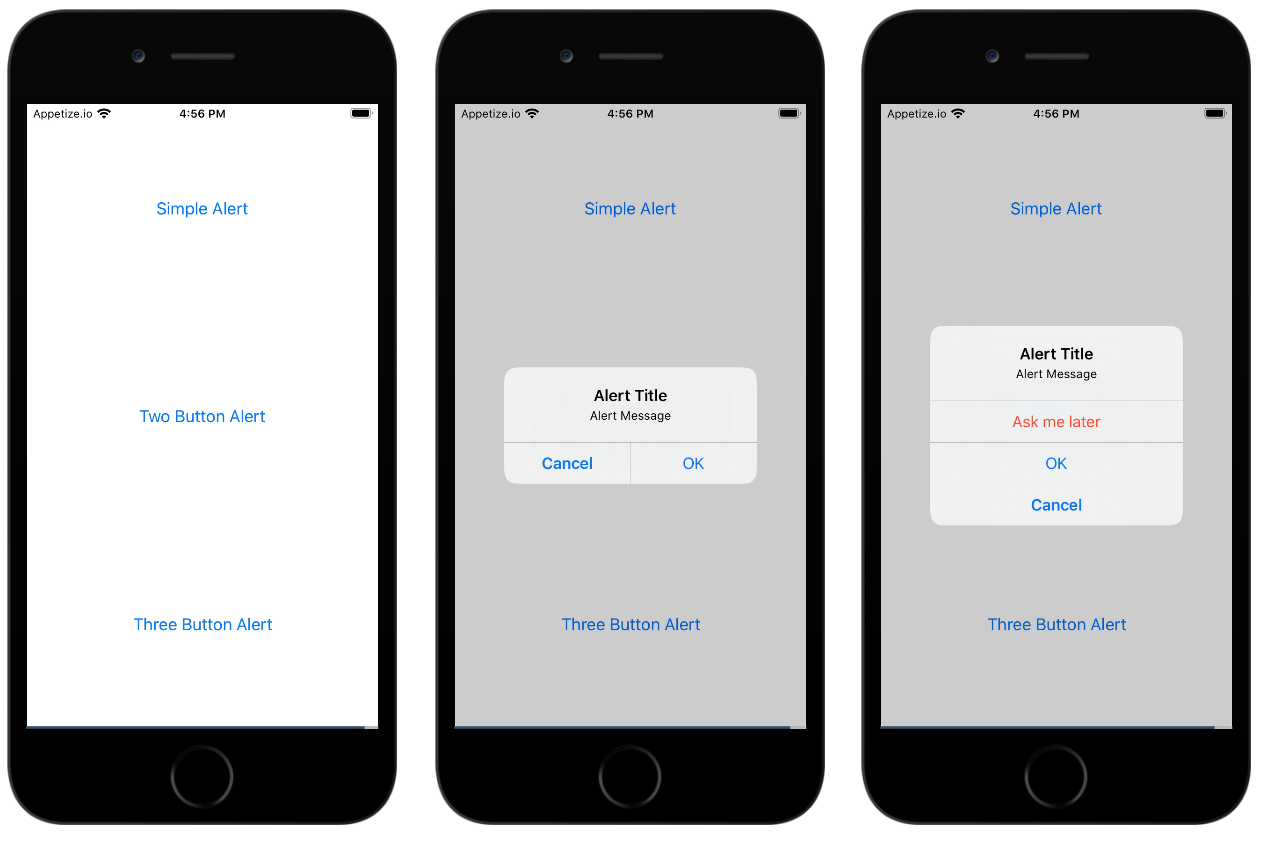
Two-Button and Three-Button alerts
You can have more than one actions in the alerts such as a Cancel button.
1import React from "react"2import { StyleSheet, Text, View, Alert, Button } from "react-native"34export default function App() {5 const showSimpleAlert = () => {6 Alert.alert("Alert Title", "Alert Message", [7 { text: "OK", onPress: () => console.log("ok Pressed") },8 ])9 }10 const showTwoButtonAlert = () => {11 Alert.alert("Alert Title", "Alert Message", [12 {13 text: "Cancel",14 onPress: () => console.log("Cancel Pressed"),15 style: "cancel",16 },17 { text: "OK", onPress: () => console.log("ok Pressed") },18 ])19 }20 const showThreeButtonAlert = () => {21 Alert.alert("Alert Title", "Alert Message", [22 {23 text: "Ask me later",24 onPress: () => console.log("Ask Me later Pressed"),25 style: "destructive",26 },27 {28 text: "Cancel",29 onPress: () => console.log("Cancel Pressed"),30 style: "cancel",31 },32 { text: "OK", onPress: () => console.log("ok Pressed") },33 ])34 }35 return (36 <View style={styles.container}>37 <Button title="Simple Alert" onPress={showSimpleAlert} />38 <Button title="Two Button Alert" onPress={showTwoButtonAlert} />39 <Button title="Three Button Alert" onPress={showThreeButtonAlert} />40 </View>41 )42}4344const styles = StyleSheet.create({45 container: {46 flex: 1,47 backgroundColor: "#fff",48 alignItems: "center",49 justifyContent: "space-around",50 },51})
- The
styleproperty is used to provide the styling for the buttons in the alerts in iOS. The possible values aredefault,cancel, anddestructive. - In Android, a maximum of 3 buttons can be provided where as in iOS you can have more than 3 buttons in the alert dialog.
Screenshots
Android:
iOS:
Dismissing Alerts in Android
In Android, you can dismiss the alert by tapping outside of the box alert. You can enable it by passing {cancelable: true} in the options.
You can optionally have a handler to be called when the user taps outside of the alert box,
by passing it to the onDismiss callback property as shown below:
1import React from "react"2import { StyleSheet, Text, View, Alert, Button } from "react-native"34export default function App() {5 const showSimpleAlert = () => {6 Alert.alert(7 "Alert Title",8 "Alert Message",9 [{ text: "OK", onPress: () => console.log("ok Pressed") }],10 {11 cancelable: true,12 onDismiss: () => console.log("Alert was closed by clicking outside"),13 }14 )15 }16 const showTwoButtonAlert = () => {17 Alert.alert("Alert Title", "Alert Message", [18 {19 text: "Cancel",20 onPress: () => console.log("Cancel Pressed"),21 style: "cancel",22 },23 { text: "OK", onPress: () => console.log("ok Pressed") },24 ])25 }26 const showThreeButtonAlert = () => {27 Alert.alert("Alert Title", "Alert Message", [28 {29 text: "Ask me later",30 onPress: () => console.log("Ask Me later Pressed"),31 style: "destructive",32 },33 {34 text: "Cancel",35 onPress: () => console.log("Cancel Pressed"),36 style: "cancel",37 },38 { text: "OK", onPress: () => console.log("ok Pressed") },39 ])40 }41 return (42 <View style={styles.container}>43 <Button title="Simple Alert" onPress={showSimpleAlert} />44 <Button title="Two Button Alert" onPress={showTwoButtonAlert} />45 <Button title="Three Button Alert" onPress={showThreeButtonAlert} />46 </View>47 )48}4950const styles = StyleSheet.create({51 container: {52 flex: 1,53 backgroundColor: "#fff",54 alignItems: "center",55 justifyContent: "space-around",56 },57})
Demo
If you have liked article, do follow me on twitter to get more real time updates!