
Table of Contents
You might have used React Redux for state management in React. With the introduction of React context API, we can use it for managing the global state in React. The official documentation recommends using context when particular information needs to be shared across the component tree, such as theme or language preference, current authenticated user, etc.
In this tutorial, we will see how we can use context API to store the current cart items, update the context whenever the user clicks on Add to cart button, and display the cart count in the header.
Basic Setup
Let's create a new react app using the below command:
1npx create-react-app react-context
Install react-icons package, which will be used for displaying cart icon:
1npm i react-icons
Create a Header component in src directory with the following code:
1import React from "react"2import { FaShoppingCart } from "react-icons/fa"34const Header = () => {5 return (6 <header>7 <nav>8 <div className="logo">CD Kart</div>9 <div className="cart">10 <FaShoppingCart size="24" />11 <span className="cart_count">1</span>12 </div>13 </nav>14 </header>15 )16}1718export default Header
Here we are adding a cart icon and displaying a count of 1, which we will replace with the value from context in the next steps.
Now, include the Header component in App.js:
1import React from "react"2import Header from "./Header"34function App() {5 return (6 <div>7 <Header />8 </div>9 )10}1112export default App
Before we run the application, let's add some basic styling in index.css:
1body {2 margin: 0 auto;3 max-width: 900px;4 font-family: Segoe UI, Arial, sans-serif;5}6nav {7 display: flex;8 justify-content: space-between;9 align-items: center;10 background-color: #333;11 color: #fff;12 padding: 1rem;13 border-bottom-left-radius: 5px;14 border-bottom-right-radius: 5px;15}16.cart {17 position: relative;18}19.logo {20 font-weight: bold;21}2223.cart_count {24 position: absolute;25 top: -8px;26 right: -10px;27 color: #fff;28 background: #ff3e6c;29 font-weight: 500;30 border-radius: 50%;31 font-size: 11px;32 width: 22px;33 height: 22px;34 text-align: center;35 line-height: 22px;36}
Now if you run the app, you should be able to see the header as shown below:

Now let's create a Product component to show product details and add to cart button.
1import React from "react"23const Product = () => {4 return (5 <div role="main" className="main">6 <div className="image">7 <img8 src="https://res.cloudinary.com/codingdeft/image/upload/v1594182634/medium_daniel_fernandez_ABZE_n_A28v_JI_unsplash_8f472f69bf.jpg"9 alt="Item"10 />11 </div>12 <div className="details">13 <p className="manufacturer">Yearin</p>14 <p className="name">Black And White Broad Checks Shirt</p>15 <p className="price">$22.99</p>16 <p className="description">17 Lorem ipsum dolor sit, amet consectetur adipisicing elit. Vitae, est.18 Quo enim hic aliquid, non omnis corrupti dicta. Mollitia reiciendis19 aperiam aut quia ad recusandae, facere qui! Cumque, voluptatum animi.20 </p>21 <p>22 <button className="atc_btn">Add to Cart</button>23 </p>24 </div>25 </div>26 )27}2829export default Product
Also, let's add some styling to the product component:
1/* ... */2.main {3 margin-top: 1rem;4 display: flex;5}6.image {7 width: 40%;8}9.image img {10 height: 300px;11 object-fit: cover;12 width: 100%;13}14.details {15 padding: 0 1rem;16 width: 60%;17 display: flex;18 flex-direction: column;19}20.manufacturer {21 color: #535665;22 opacity: 0.8;23 font-weight: 500;24 margin-bottom: 5px;25}2627.name {28 font-size: 1.4rem;29 font-weight: 500;30 text-transform: capitalize;31 margin-top: 0;32}33.price {34 font-weight: 500;35 font-size: 1.6rem;36 margin-top: 0;37 margin-bottom: 5px;38}39.description {40 color: #535665;41 opacity: 0.8;42 margin-top: 0;43 flex-grow: 1;44}45.atc_btn {46 color: #fff;47 background-color: #28a745;48 border-color: #28a745;49 border: 1px solid transparent;50 padding: 0.375rem 0.75rem;51 font-size: 1rem;52 line-height: 1.5;53 border-radius: 0.25rem;54 cursor: pointer;55}56.atc_btn:hover {57 background-color: #218838;58 border-color: #1e7e34;59}60.atc_btn:focus {61 box-shadow: 0 0 0 0.2rem rgba(72, 180, 97, 0.5);62 outline: 0;63}
Finally, include the Product component inside the App component:
1import React from "react"2import Header from "./Header"3import Product from "./Product"45function App() {6 return (7 <div>8 <Header />9 <Product />10 </div>11 )12}1314export default App
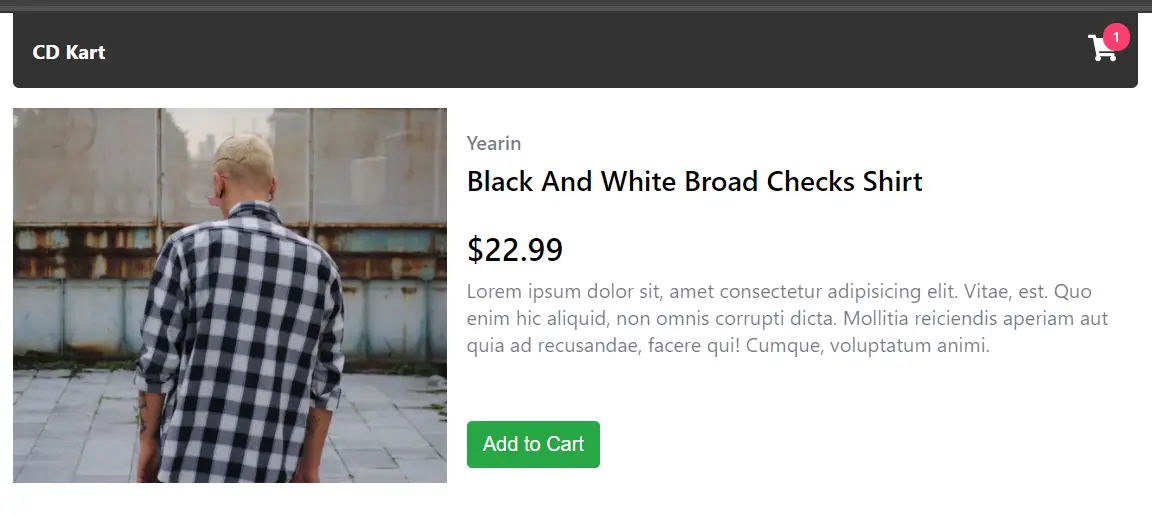
Now if you run the app, you should be able to see the product page with details like image, name, description etc as shown below:
The Cart Context
Now create a component called CartContext with the below code:
1import React, { useState } from "react"23const CartContext = React.createContext([[], () => {}])45let initialState = []67// Wrapper around CartContext.Provider, which has a local state,8// which will be used to maintain the cart items.9const CartProvider = props => {10 const [state, setState] = useState(initialState)11 return (12 <CartContext.Provider value={[state, setState]}>13 {props.children}14 </CartContext.Provider>15 )16}1718export { CartContext, CartProvider }
React.createContext
In the above code, the below line is used to create a context.
The value we passed to createContext is the default value
and it defines the structure of the data that we will be storing in the context.
Here if you see the structure is similar to the response of useState hook,
the first parameter being an array/object and the second being a function call.
1const CartContext = React.createContext([[], () => {}])
It is not necessary to provide the structure as a default value, we can provide a null value as well.
When we provide the structure in the default value,
it helps in testing the components independently without wrapping them with the context provider.
Context.Provider
If we need to access the context values within a component, it has to be wrapped within the context provider. Every context comes with a provider, to which we can pass the initial values of the context.
In our code, we are passing the value of state the useState function, so that when we consume the context,
we can use it like how we use useState hook.
Since we would want the context to be available throughout our application, let's wrap the App component within the CartProvider
1import React from "react"2import ReactDOM from "react-dom"3import "./index.css"4import App from "./App"5import { CartProvider } from "./CartContext"67ReactDOM.render(8 <React.StrictMode>9 <CartProvider>10 <App />11 </CartProvider>12 </React.StrictMode>,13 document.getElementById("root")14)
Adding to Cart
In order to access the data stored in the context, we can make use of the useContext hook:
1import React, { useContext } from "react"2import { CartContext } from "./CartContext"34const Product = () => {5 const [contextValue, setContext] = useContext(CartContext)67 const addToCart = () => {8 const productId = 100019 setContext(oldValues => {10 const productIndex = oldValues.findIndex(11 val => val.productId === productId12 )1314 let updatedCartItems = []1516 // If the product already exists in cart, then update the quantity17 if (productIndex !== -1) {18 updatedCartItems = [19 ...oldValues.slice(0, productIndex),20 {21 productId,22 count: oldValues[productIndex].count + 1,23 },24 ...oldValues.slice(productIndex + 1),25 ]26 } else {27 //Otherwise add the item to the end of the array28 updatedCartItems = [...oldValues, { productId, count: 1 }]29 }3031 return updatedCartItems32 })33 }34 return (35 <div role="main" className="main">36 <div className="image">37 <img38 src="https://res.cloudinary.com/codingdeft/image/upload/v1594182634/medium_daniel_fernandez_ABZE_n_A28v_JI_unsplash_8f472f69bf.jpg"39 alt="Item"40 />41 </div>42 <div className="details">43 <p className="manufacturer">Yearin</p>44 <p className="name">Black And White Broad Checks Shirt</p>45 <p className="price">$22.99</p>46 <p className="description">47 Lorem ipsum dolor sit, amet consectetur adipisicing elit. Vitae, est.48 Quo enim hic aliquid, non omnis corrupti dicta. Mollitia reiciendis49 aperiam aut quia ad recusandae, facere qui! Cumque, voluptatum animi.50 </p>51 <p>52 <button className="atc_btn" onClick={addToCart}>53 Add to Cart54 </button>55 </p>56 </div>57 </div>58 )59}6061export default Product
In the addToCart function, we are calling the setContext function with a callback function,
which will receive the existing cart items and then we check if the item is already in the list.
If so, we increment the count of that item.
If not, we add a new product to the list with the value of productId and quantity as 1.
Displaying the Cart Count
Now we have added items to the cart context, let's display it in the header:
1import React, { useContext } from "react"2import { FaShoppingCart } from "react-icons/fa"3import { CartContext } from "./CartContext"45const Header = () => {6 const [cartItems] = useContext(CartContext)7 //Loop through the items and find the total count8 const totalCount = cartItems.reduce(9 (prevValue, currentValue) => prevValue + currentValue.count,10 011 )12 return (13 <header>14 <nav>15 <div className="logo">CD Kart</div>16 <div className="cart">17 <FaShoppingCart size="24" />18 {totalCount > 0 && <span className="cart_count">{totalCount}</span>}19 </div>20 </nav>21 </header>22 )23}2425export default Header
Now if you test the app, you should see that the count is shown in header:

Retaining the cart items using local storage
You would have observed that if you refresh the screen after adding to the cart, it gets reset. This is because we are not persisting the cart items anywhere so that it can be used to display the cart count between refreshes.
So whenever we are adding to cart, let's save it to local storage as well:
1// ...23const addToCart = () => {4 const productId = 100015 setContext(oldValues => {6 const productIndex = oldValues.findIndex(val => val.productId === productId)78 let updatedCartItems = []910 // If the product already exists in cart, then update the quantity11 if (productIndex !== -1) {12 updatedCartItems = [13 ...oldValues.slice(0, productIndex),14 {15 productId,16 count: oldValues[productIndex].count + 1,17 },18 ...oldValues.slice(productIndex + 1),19 ]20 } else {21 //Otherwise add the item to the end of the array22 updatedCartItems = [...oldValues, { productId, count: 1 }]23 }2425 try {26 window.localStorage.setItem("cartItems", JSON.stringify(updatedCartItems))27 } catch (e) {28 console.error("Error in storing cart items in local storage")29 }3031 return updatedCartItems32 })33}34// ...
Also, when we initialize our context, let's fetch the value from local storage:
1import React, { useState } from "react"23const CartContext = React.createContext([[], () => {}])45let initialState = []67try {8 // Get the cart items from local storage9 const item = window.localStorage.getItem("cartItems")10 initialState = item ? JSON.parse(item) : []11} catch (error) {12 // If error do nothing. initialState will be set to empty array indicating no products in cart13}1415// Wrapper around CartContext.Provider, which has a local state,16// which will be used to maintain the cart items.1718const CartProvider = props => {19 const [state, setState] = useState(initialState)20 return (21 <CartContext.Provider value={[state, setState]}>22 {props.children}23 </CartContext.Provider>24 )25}2627export { CartContext, CartProvider }
Now if you refresh the page, you should see the cart count is getting retained.
Also if you change the productId in addToCart function and add to cart,
you will be able to see how it is represented in local storage:

Source code and Demo
You can view the complete source code here and a demo here.
If you have liked article, do follow me on twitter to get more real time updates!